Prior to starting WebLogic, you must ensure that the CLASSPATH of the server refers to the jar files that make up the Teradata JDBC Driver.
Your classpath must include terajdbc4.jar.
Beginning with Teradata JDBC Driver 16.20.00.11, tdgssconfig.jar is no longer used.
With older versions of the Teradata JDBC Driver, your classpath must also include tdgssconfig.jar.
The recommended way to create a Connection Pool within WebLogic is to use the graphical interface of the administrative server.
Use the Desktop "Start" button as follows:
Start → Programs → BEA WebLogic Platform 8.1 → Examples → WebLogic Server Examples → Server Admin Console
In the left pane, click to expand the "examples" node
Click to expand the "Services" node
Click to expand the "JDBC" node in Services
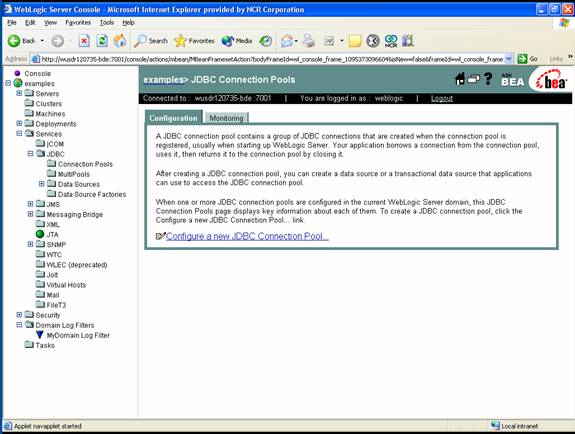
Click on "Connection Pools" in JDBC
The right pane will show all of the Connection Pools currently defined.
Click "Configure a new JDBC Connection Pool..."
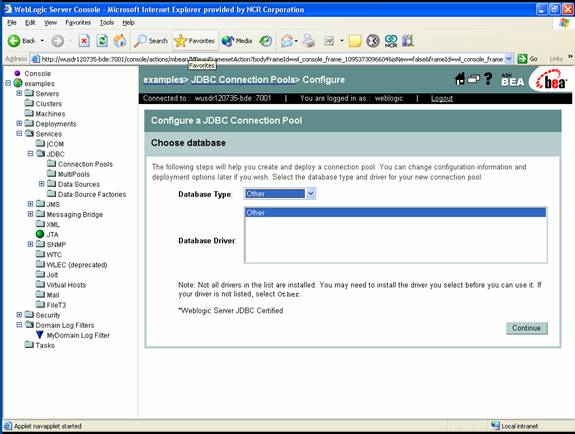
Select "Other" for the Database Type
"Other" is automatically selected for the Database Driver
Press "Continue"
Next, the details of the Teradata Connection Pool must be filled in.
The values required to create the connection pool are listed in the following table. Please note that the username of "guest" and password of "please" are examples and should be replaced by the actual username/password combination for your Teradata Database system.
Field |
Value |
Example |
Name |
The name of the connection pool. This value is user-defined. | tera4 |
Driver Classname |
The name of the class that implements the java.sql.Driver interface. | com.teradata.jdbc.TeraDriver |
URL |
Defines the URL that will be passed to the driver.
The example database hostname is "whomooz".
You should use the actual database hostname for your site.
Please note that any connection URL parameter such as "CHARSET" or "TMODE" must be set within this URL parameter. These CANNOT be set within the properties panel. |
jdbc:teradata://whomooz |
Database User Name |
The database username. | guest |
Password |
The password of the database user.
This can be used to override the password value in Properties. It allows you to avoid storing cleartext passwords. After this value is applied it will not be visible as cleartext in the panel. |
please |
Fill in the connection properties as shown in the figure below.
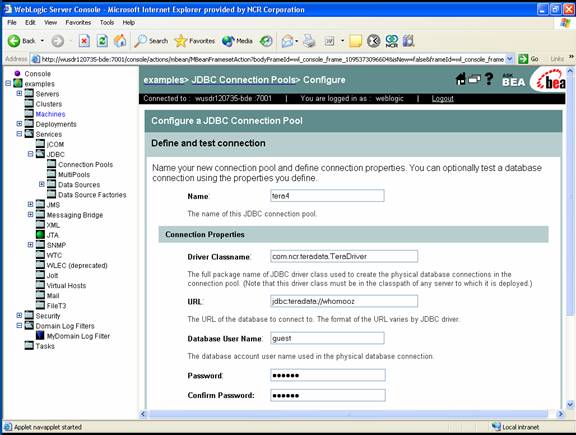
Click "Test Driver Configuration" to check for errors. If there are no errors, click "Continue".
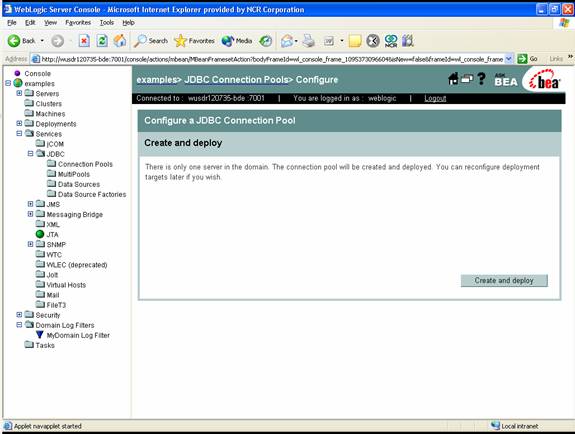
To create and deploy the pool click "Create and deploy" as shown in the figure below.
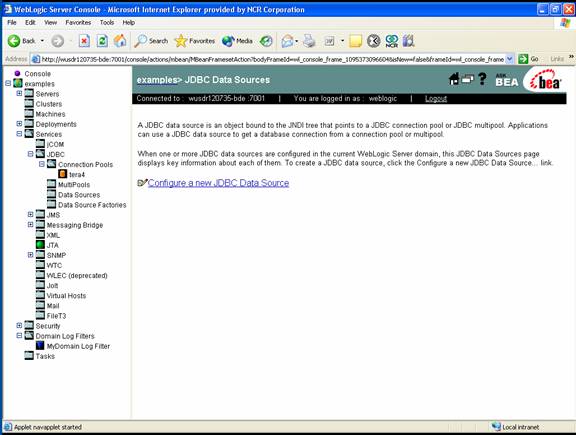
The JDBC Data Source allows you to access a connection pool. Using a Data Source enables an application to be independent of both the actual database being accessed and the type of JDBC driver being used.
Use the Desktop "Start" button as follows:
Start → Programs → BEA WebLogic Platform 8.1 → Examples → WebLogic Platform → Server Admin Console
In the left pane, click to expand the "examples" node
Click to expand the "Services" node
Click to expand the "JDBC" node in Services
Click the "Data Sources" node in JDBC
The right pane will show all of the Data Sources currently defined.
Select "Configure a new JDBC Data Source"
The following table lists the parameters that must be set for a Data Source.
Field |
Value |
Example |
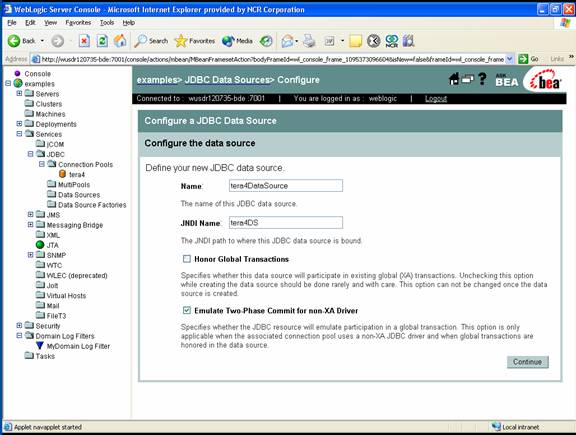
Name |
The user-defined display name for this DataSource. | tera4DataSource |
JNDI Name |
User-defined JNDI name of the DataSource. | tera4DS |
Honor Global Transactions |
Specifies whether the Data Source can be treated as a javax.sql.XADataSource that supports distributed transactions. This box should be checked if you are using Container Managed Persistence (CMP) Entity Beans. Otherwise, it should remain unchecked. | (unchecked) |
Emulate Two-Phase Commit for non-XA Driver |
Specifies that the JDBC driver is not a javax.sql.XADataSource, and that the JDBC driver does not support distributed transactions. The Teradata JDBC Driver does not currently support XA or distributed transactions. | (checked) |
Enter the appropriate database parameters, as shown in the figure below. Be sure that "Emulate Two-Phase Commit for non-XA Driver" is checked. Press "Continue" when you are finished.
Next, associate the JDBC data source with a connection pool, as shown in the figure below.
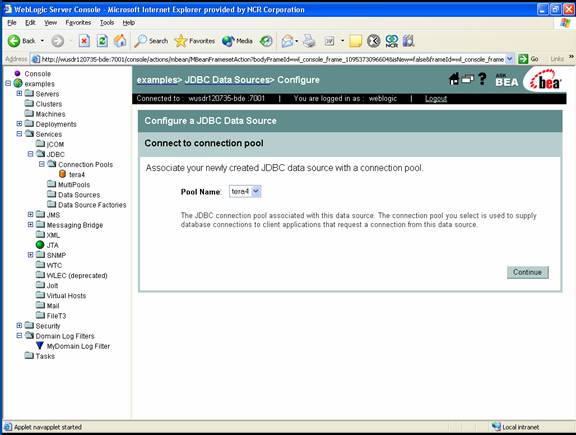
Select the connection pool name you defined in the last step from the Pool Name combo box.
Press "Continue".
Select the target server. In this example, select "examplesServer" as shown in the figure below.
Press "Create" to create the data source.

WebLogic requires a valid database username and password to be specified in the connection pool definition. The database username and password specified in the connection pool definition are the ones that are always used to connect to the database.
When the application calls DataSource.getConnection(), then the username and password specified in the connection pool definition are used to connect to the database.
When the application calls DataSource.getConnection(username,password), then the username and password arguments to getConnection are validated against the WebLogic server realm.
If there is no WebLogic user defined in the WebLogic server realm that corresponds to the username argument to getConnection, then WebLogic will throw the following SQLException:
Message: "User: YourUserId, failed to be authenticated."
SQLState: null
Error code: 0
If the username and password arguments to getConnection are successfully validated against the WebLogic server realm, then the username and password specified in the connection pool definition are used to connect to the database.
Note: The username and password arguments to getConnection are totally separate from the username and password specified in the connection pool definition. The username and password arguments to getConnection are used by WebLogic only, and are validated against the WebLogic server realm. The username and password arguments to getConnection are NOT used for the database.
Note: This behavior of WebLogic differs from the JDBC API standard, and it differs from the behavior of other application servers.
The following code creates the initial context:
Context ctx = new InitialContext();
To perform a JNDI lookup to obtain the DataSource, the following code can be used:
DataSource ds = (DataSource) ctx.lookup(jndiName);
To obtain a connection from the DataSource, the following code can be used:
Connection con = ds.getConnection();
At this point, the connection obtained behaves the same way as one that was obtained from the Driver Manager.
Complete sample servlets are listed here.
The following performance parameters are visible after selecting a specific Connection Pool and then selecting the "Connections" tab within the WebLogic Administrator Console. Their setting can impact the performance of your application.
Maximum Capacity - too small of a value here can cause users of the pool to waste time waiting for someone to release a connection.
Login Delay - this defaults to zero and should remain at that value. Inserting a value here could cause unnecessary delays.
Test Created Connections - selecting this option will hurt your performance with no apparent benefit to your application.
Test Reserved Connections - this determines whether connections are tested before being given to a client. Turning on this option will cause your application to run slightly slower, but it will take advantage of WebLogic's automatic testing of connections, so that your application won't need to handle the situation where the connection it gets is not working. Turning off this option will cause your application to run slightly faster, but it will not use WebLogic's automatic testing of connections, so that your application will need to handle the situation where the connection it gets is not working.
Test Table Name - a table the DataSource user has access to which
contains a small number of rows.
The SQL executed will be: select count(*) from TestTableName
Also note that there is a Monitoring Tab available that can help you track the performance of a Connection Pool.
To manage transactions correctly for contained-managed persistence (CMP) entity beans, the WebLogic EJB container requires a TXDataSource (not a plain data source) to be specified.
To configure a new TXDataSource using WebLogic server Admin Console, the "Honor Global Transactions" and "Emulate Two-Phase Commit for non-XA Driver" checkboxes must be checked.