How to enable WebSphere Java2 Security
How to enable Java 2 security on WebSphere 6.0
- Logon to WebSphere 6.0 administrative console
- Select and expand "Security" on the left navigation pane
- Click on Global security
- Check the checkbox for "Enforce Java 2 security"
- Click "Apply"
- Click "Save" to save your workspace changes to the master configuration
- The server may need to be restarted for the changes to take effect
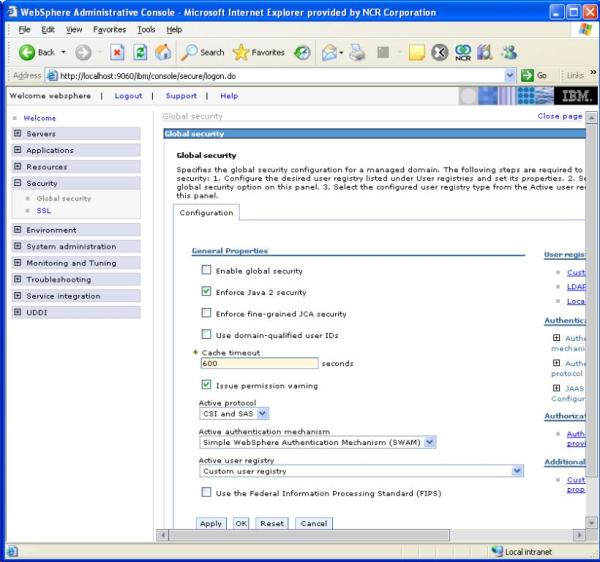
How to enable Java 2 security on WebSphere 6.1
- Logon to WebSphere 6.1 administrative console
- Select and expand "Security" on the left navigation pane
- Click on "Secure administration, applications, and infrastructure"
- In the "Java 2 security" section on the "Configuration" pane, check the checkbox for "Use Java 2 security to restrict application access to local resources"
- Click "Apply"
- Click "Save" to save your workspace changes to the master configuration
- The server may need to be restarted for the changes to take effect

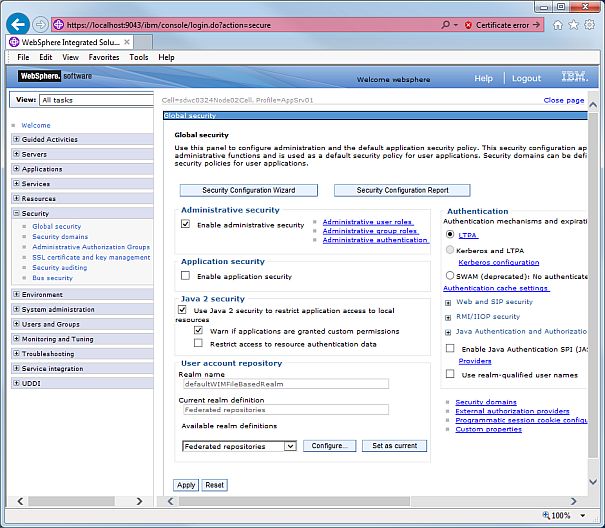
How to enable Java 2 security on WebSphere 7.0
- Logon to WebSphere 7.0 administrative console
- Select and expand "Security" on the left navigation pane
- Click on "Global Security"
- In the "Java 2 security" section on the "Configuration" pane, check the checkbox for "Use Java 2 security to restrict application access to local resources"
- Click "Apply"
- Click "Save" to save your workspace changes to the master configuration
- The server may need to be restarted for the changes to take effect
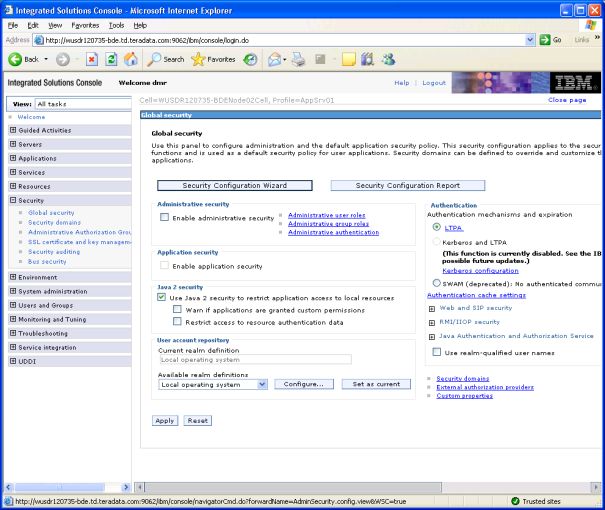
How to enable Java 2 security on WebSphere 8.0, 8.5, and 9.0
- Logon to the WebSphere administrative console
- Select and expand "Security" on the left navigation pane
- Click on "Global Security"
- In the "Java 2 security" section on the "Configuration" pane, check the checkbox for "Use Java 2 security to restrict application access to local resources"
- Click "Apply"
- Click "Save" to save your workspace changes to the master configuration
- The server may need to be restarted for the changes to take effect