To create a data connection to Teradata using the .NET Data Provider for Teradata, start a Microsoft Visual Studio instance. Establishing a connection may be performed without creating a project or solution in Visual Studio.
- In the Visual Studio menu, click View -> Server Explorer to display this pane.
- Either from the Tools menu item (select Connect to Database) or right click the Data Connections on the Server Explorer pane (select Add Connection) and change the Data Source by selecting the Change button on the Data Connections dialog box.
- Select the Teradata database from the Data Source list box. Insure that the .NET Data Provider for Teradata is selected in the Provider list box. Select the OK button to continue.
- A dialog box customized to a Teradata data source is displayed. Complete the server name and supply a valid User name and Password or Authentication String. Click on the Test Connection button to ensure a correctly defined data source. Upon a successful connection, select the OK button to save this data source. You may rename the connection from the Server Explorer pane.
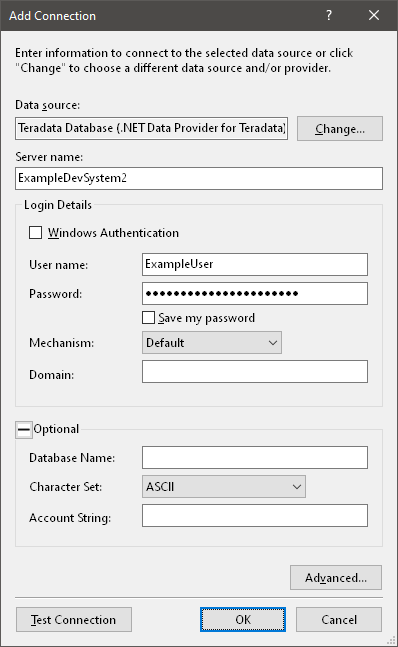
A short description of the connection dialog follows:
- Data source: The Teradata data source should be present indicating the .NET Data Provider for Teradata.
- Server name: The Advanced SQL Engine server name.
- Windows Authentication: Checking this box enables integrated security, by providing the logon credentials from Microsoft Windows. The user name and password are disabled.
- User name: The Teradata user name. This field must be supplied for all mechanisms, unless Windows Authentication is selected.
- Password: The Teradata password. This field must be supplied for all mechanisms, unless Windows Authentication is selected.
- Save my password: This streams the password into the connection stream and saves the information for a future connection.
- Mechanism: This list box contains authentication mechanisms supported by Teradata. The .NET TeraGSS configuration must be configured to enable all applicable site mechanisms. Leaving the mechanism box blank will utilize the default mechanism defined in the .NET TeraGSS configuration. If the .NET TeraGSS configuration does not specify a default mechanism, then the server default mechanism is selected.
The "Advanced..." button is available for custom authentication strings which may be used with some authentication mechanisms such as LDAP. The key field names (or formats) may differ depending on the site's LDAP definition. An example of a LDAP authentication definition:
     AuthenticationString = "authcid=guestldap password=passLDAP01"
     AuthenticationMechanism = "LDAP"
For more information on authentication mechanisms please see the Security Administration manual. - Domain: Mechanisms such as SPNEGO utilize this field to define a domain which may be required for the authentication string. This is site-specific, and this field may be left blank to indicate that no domain will be supplied in the authentication string.
- Database Name: During a connection the current database may be changed from the default database by providing the desired database name in this field.
- Character Set: The default session character set of ASCII will be utilized unless another entry is supplied from the available items in the list box.
- Account String: An optional account name or account string that specifies a user account.